3D Printing: Alice in Wonderland Shadowbox
Alright, so perhaps I was optimistic on the site move and the speed at which I would release new posts, but here we are.
I’ve been really enjoying HueForge lately, having made several shadow boxes of family photos as gifts, I decided I wanted to stretch my legs a little, and really test my HueForge and design skills.
I wont bury the lead, here’s the finished product, stick around if you want to know the hows.

With all the fun stuff out of the way, let’s get down to the real details. So first of all, I used a mix of tools to get the job done. You can probably guess a few.
I’m going to be glosing over a lot of the finer details here, because nobody wants a book. The jist of it was I wanted to make a shadowbox, so I needed to isolate at least 2 distinct layers. A simple background and foreground was enough for this project. So first stop, GIMP.
The Background
I used it to remove Alice and do a ton of touchup work on the original Disney Classics #8 cover. I had to really flatten things out, denoise, redraw a few lines to subtle for the later process.
I moved it from GIMP over to HueForge and started playing with settings and colors. This took a lot of fiddling.
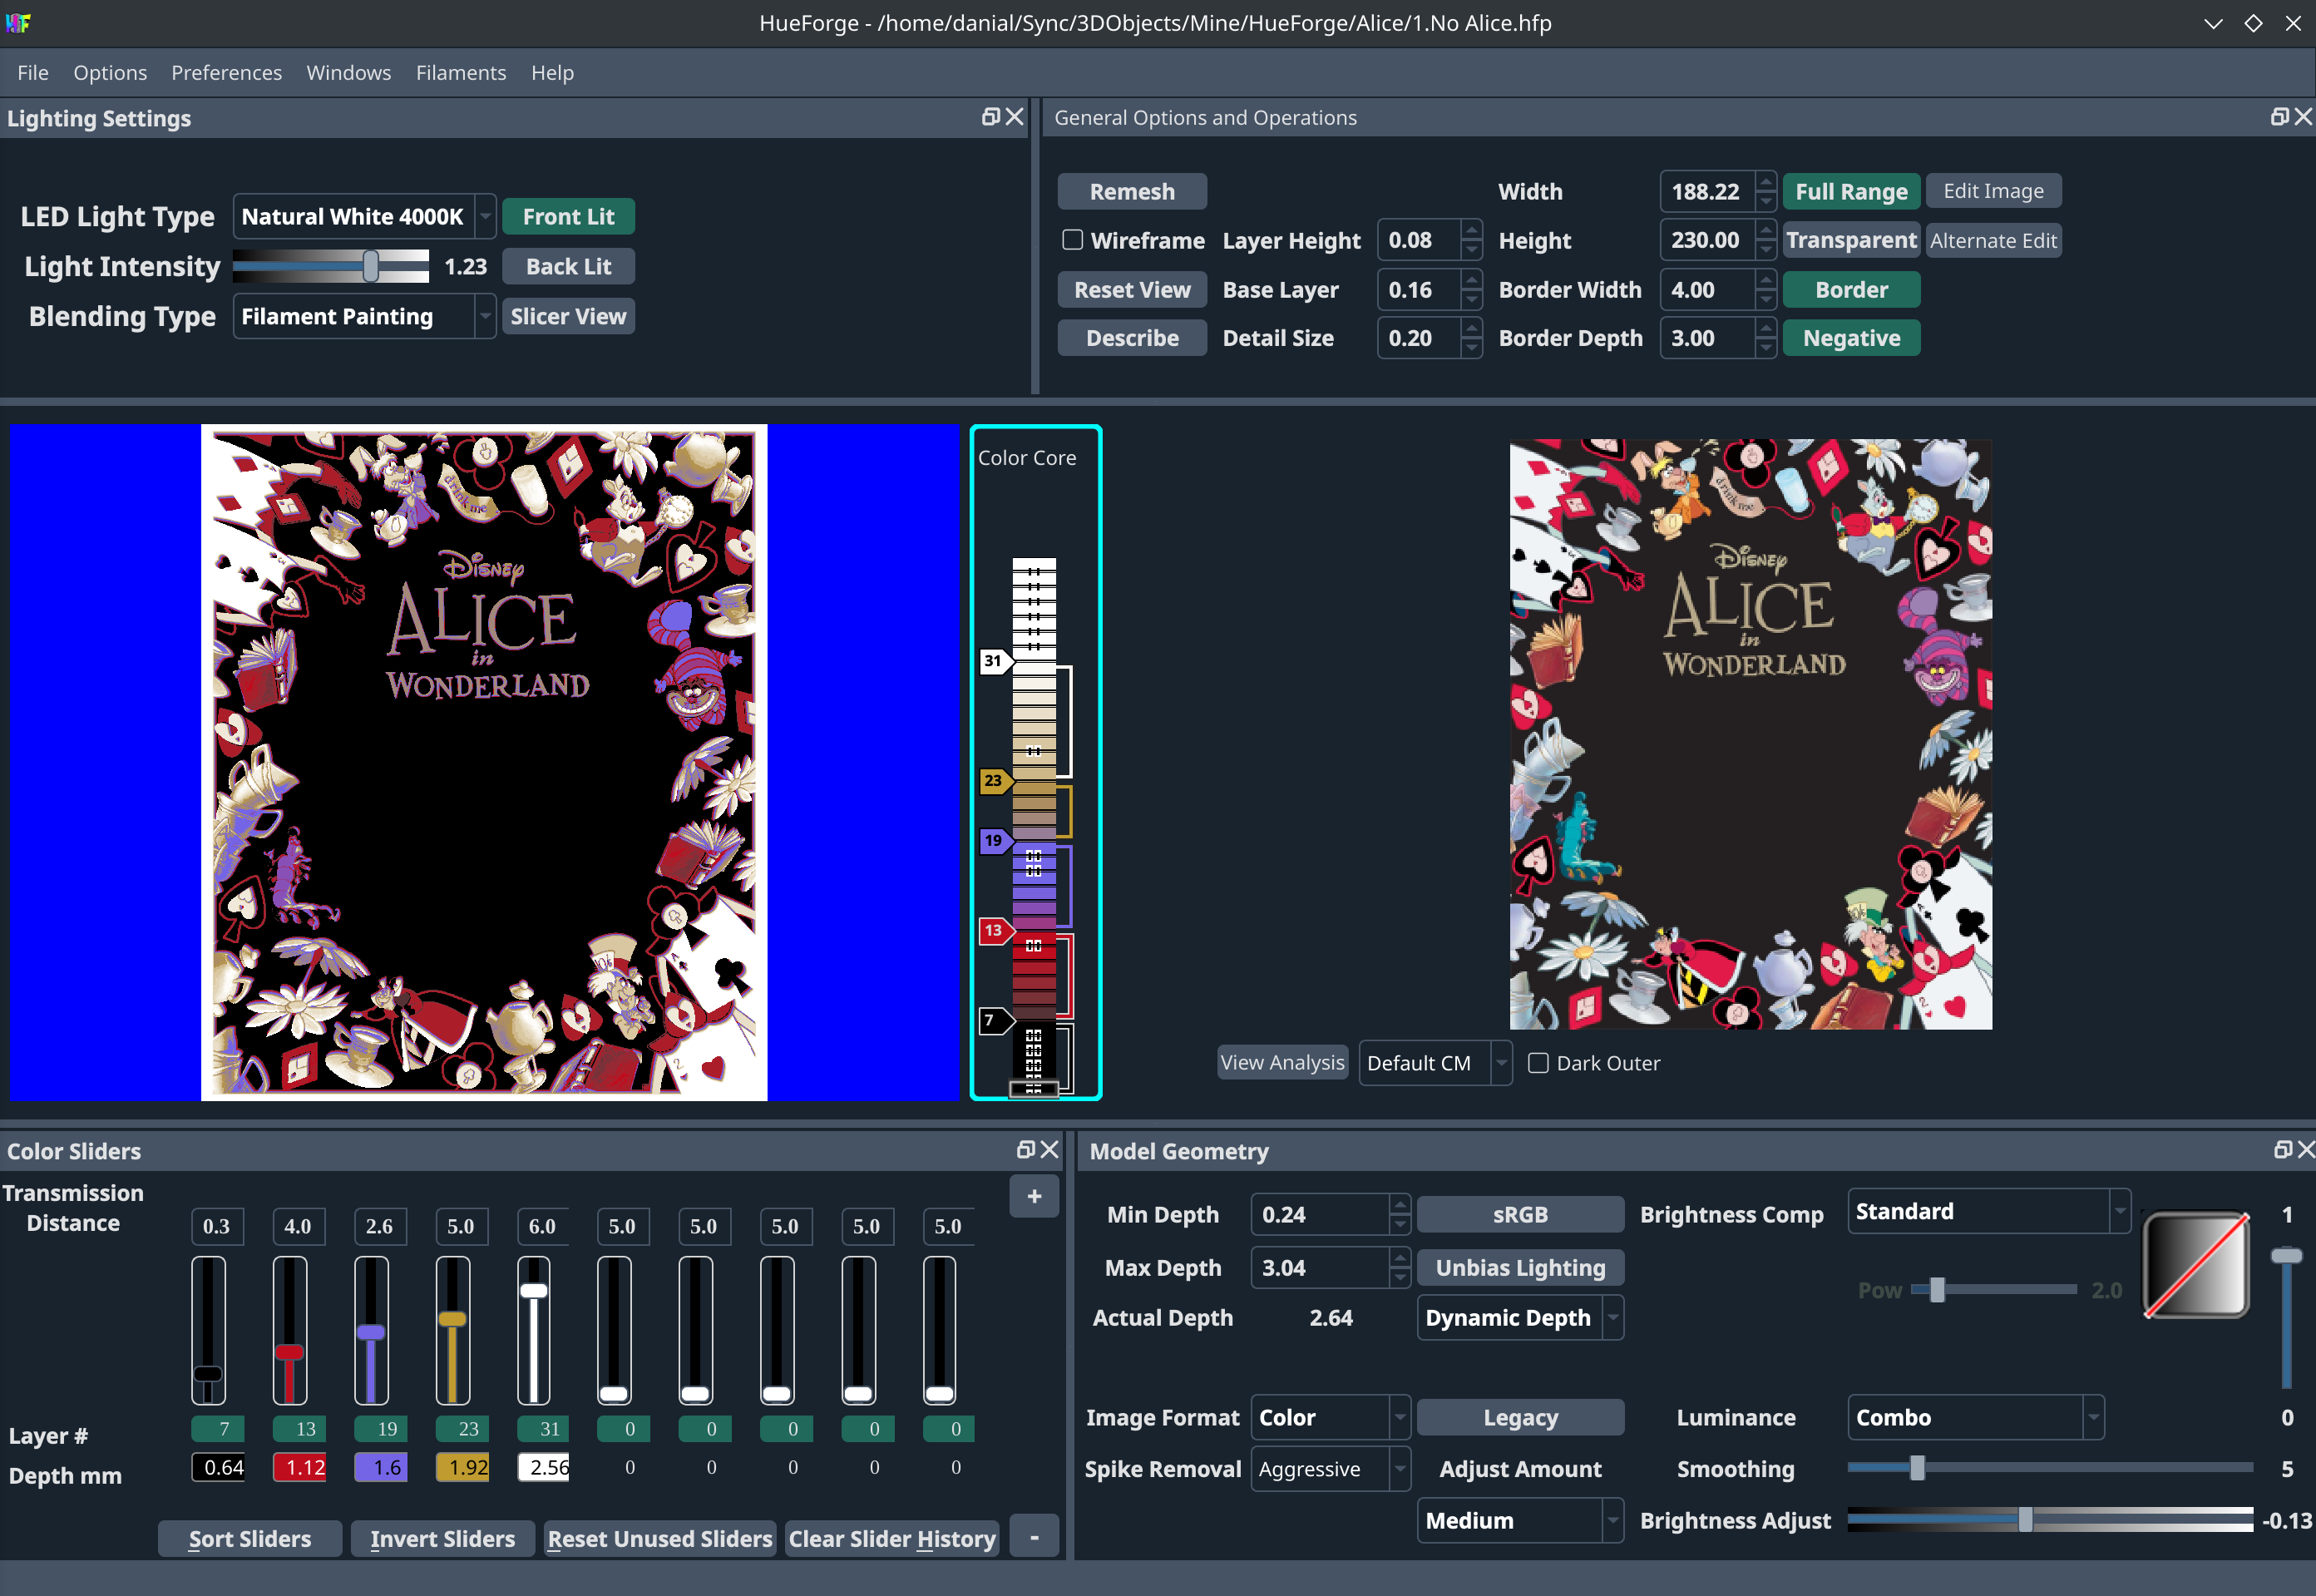
I had to pass it back and forth from GIMP to HueForge to get the colors where I wanted them and make sure it was clean enough to successfully print. Specifically, the compression artifacts from the scans I could find online were quite brutal on the process. For photos, I find compression to be fine, but for drawn art like this, it made a huge difference.
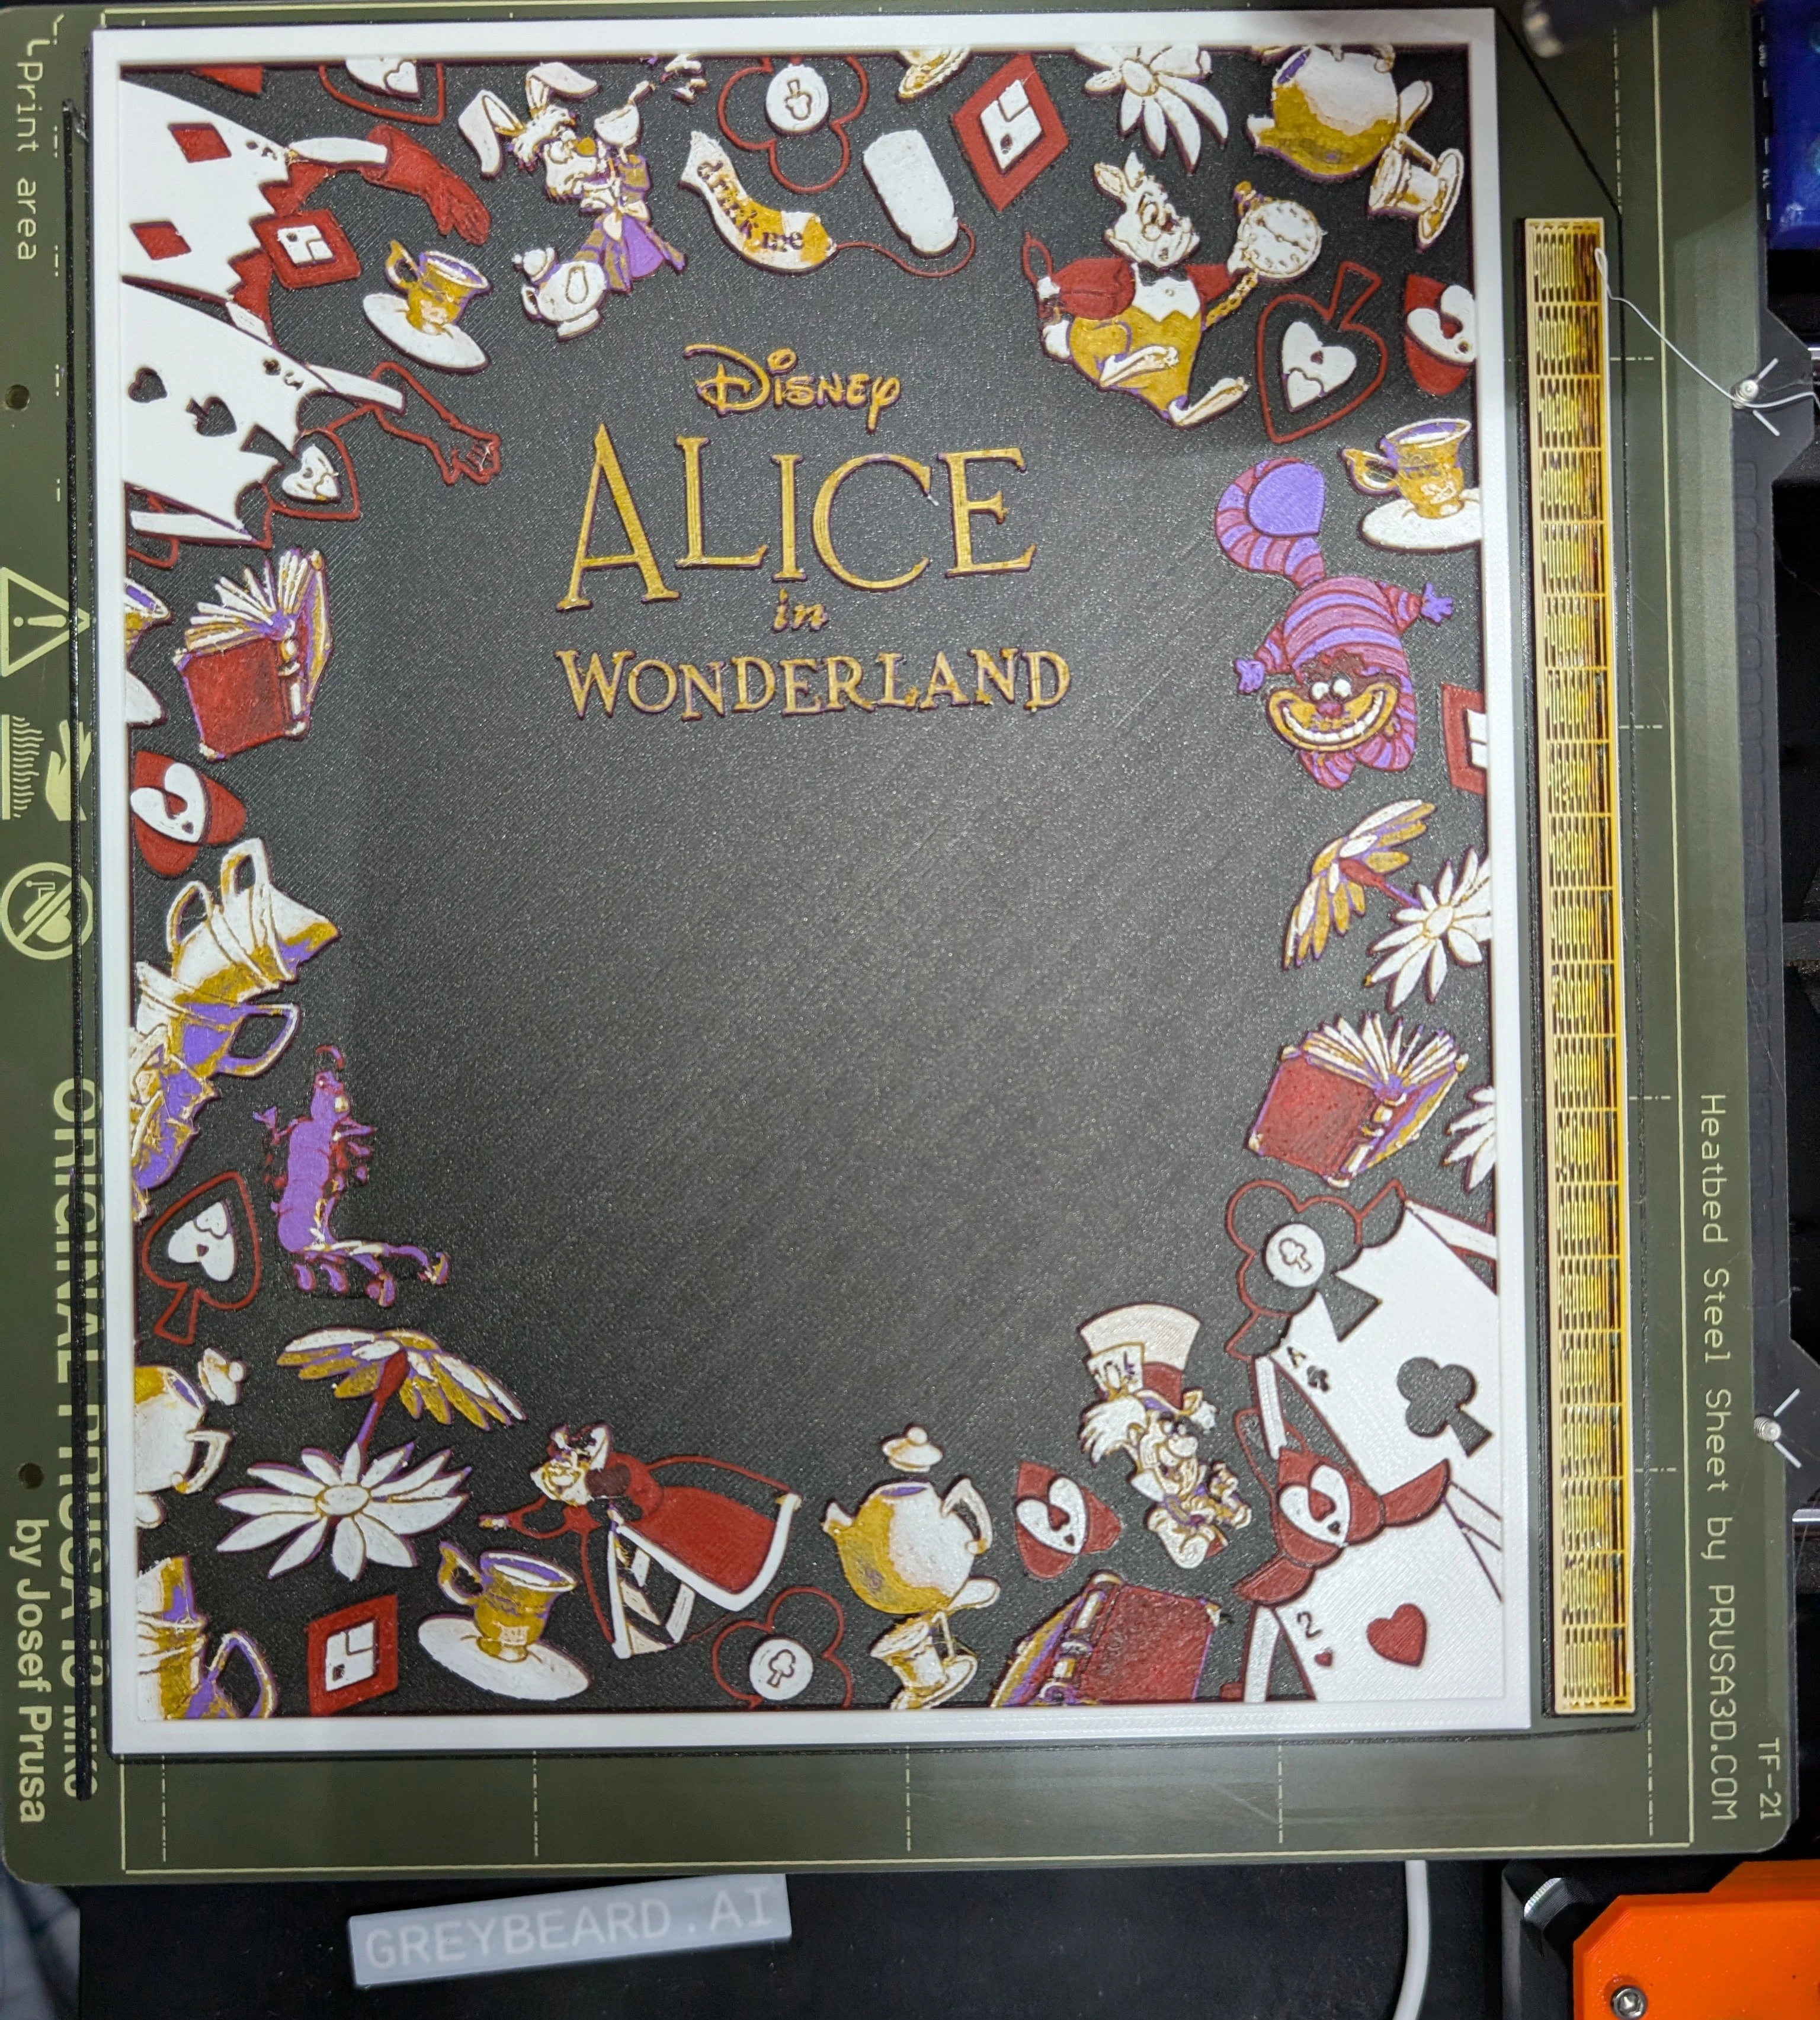
Not bad. It had quite a bit of stringing, but a large part of that was my very old white filament. I hit it with a heatgun and that cleaned up most of them.
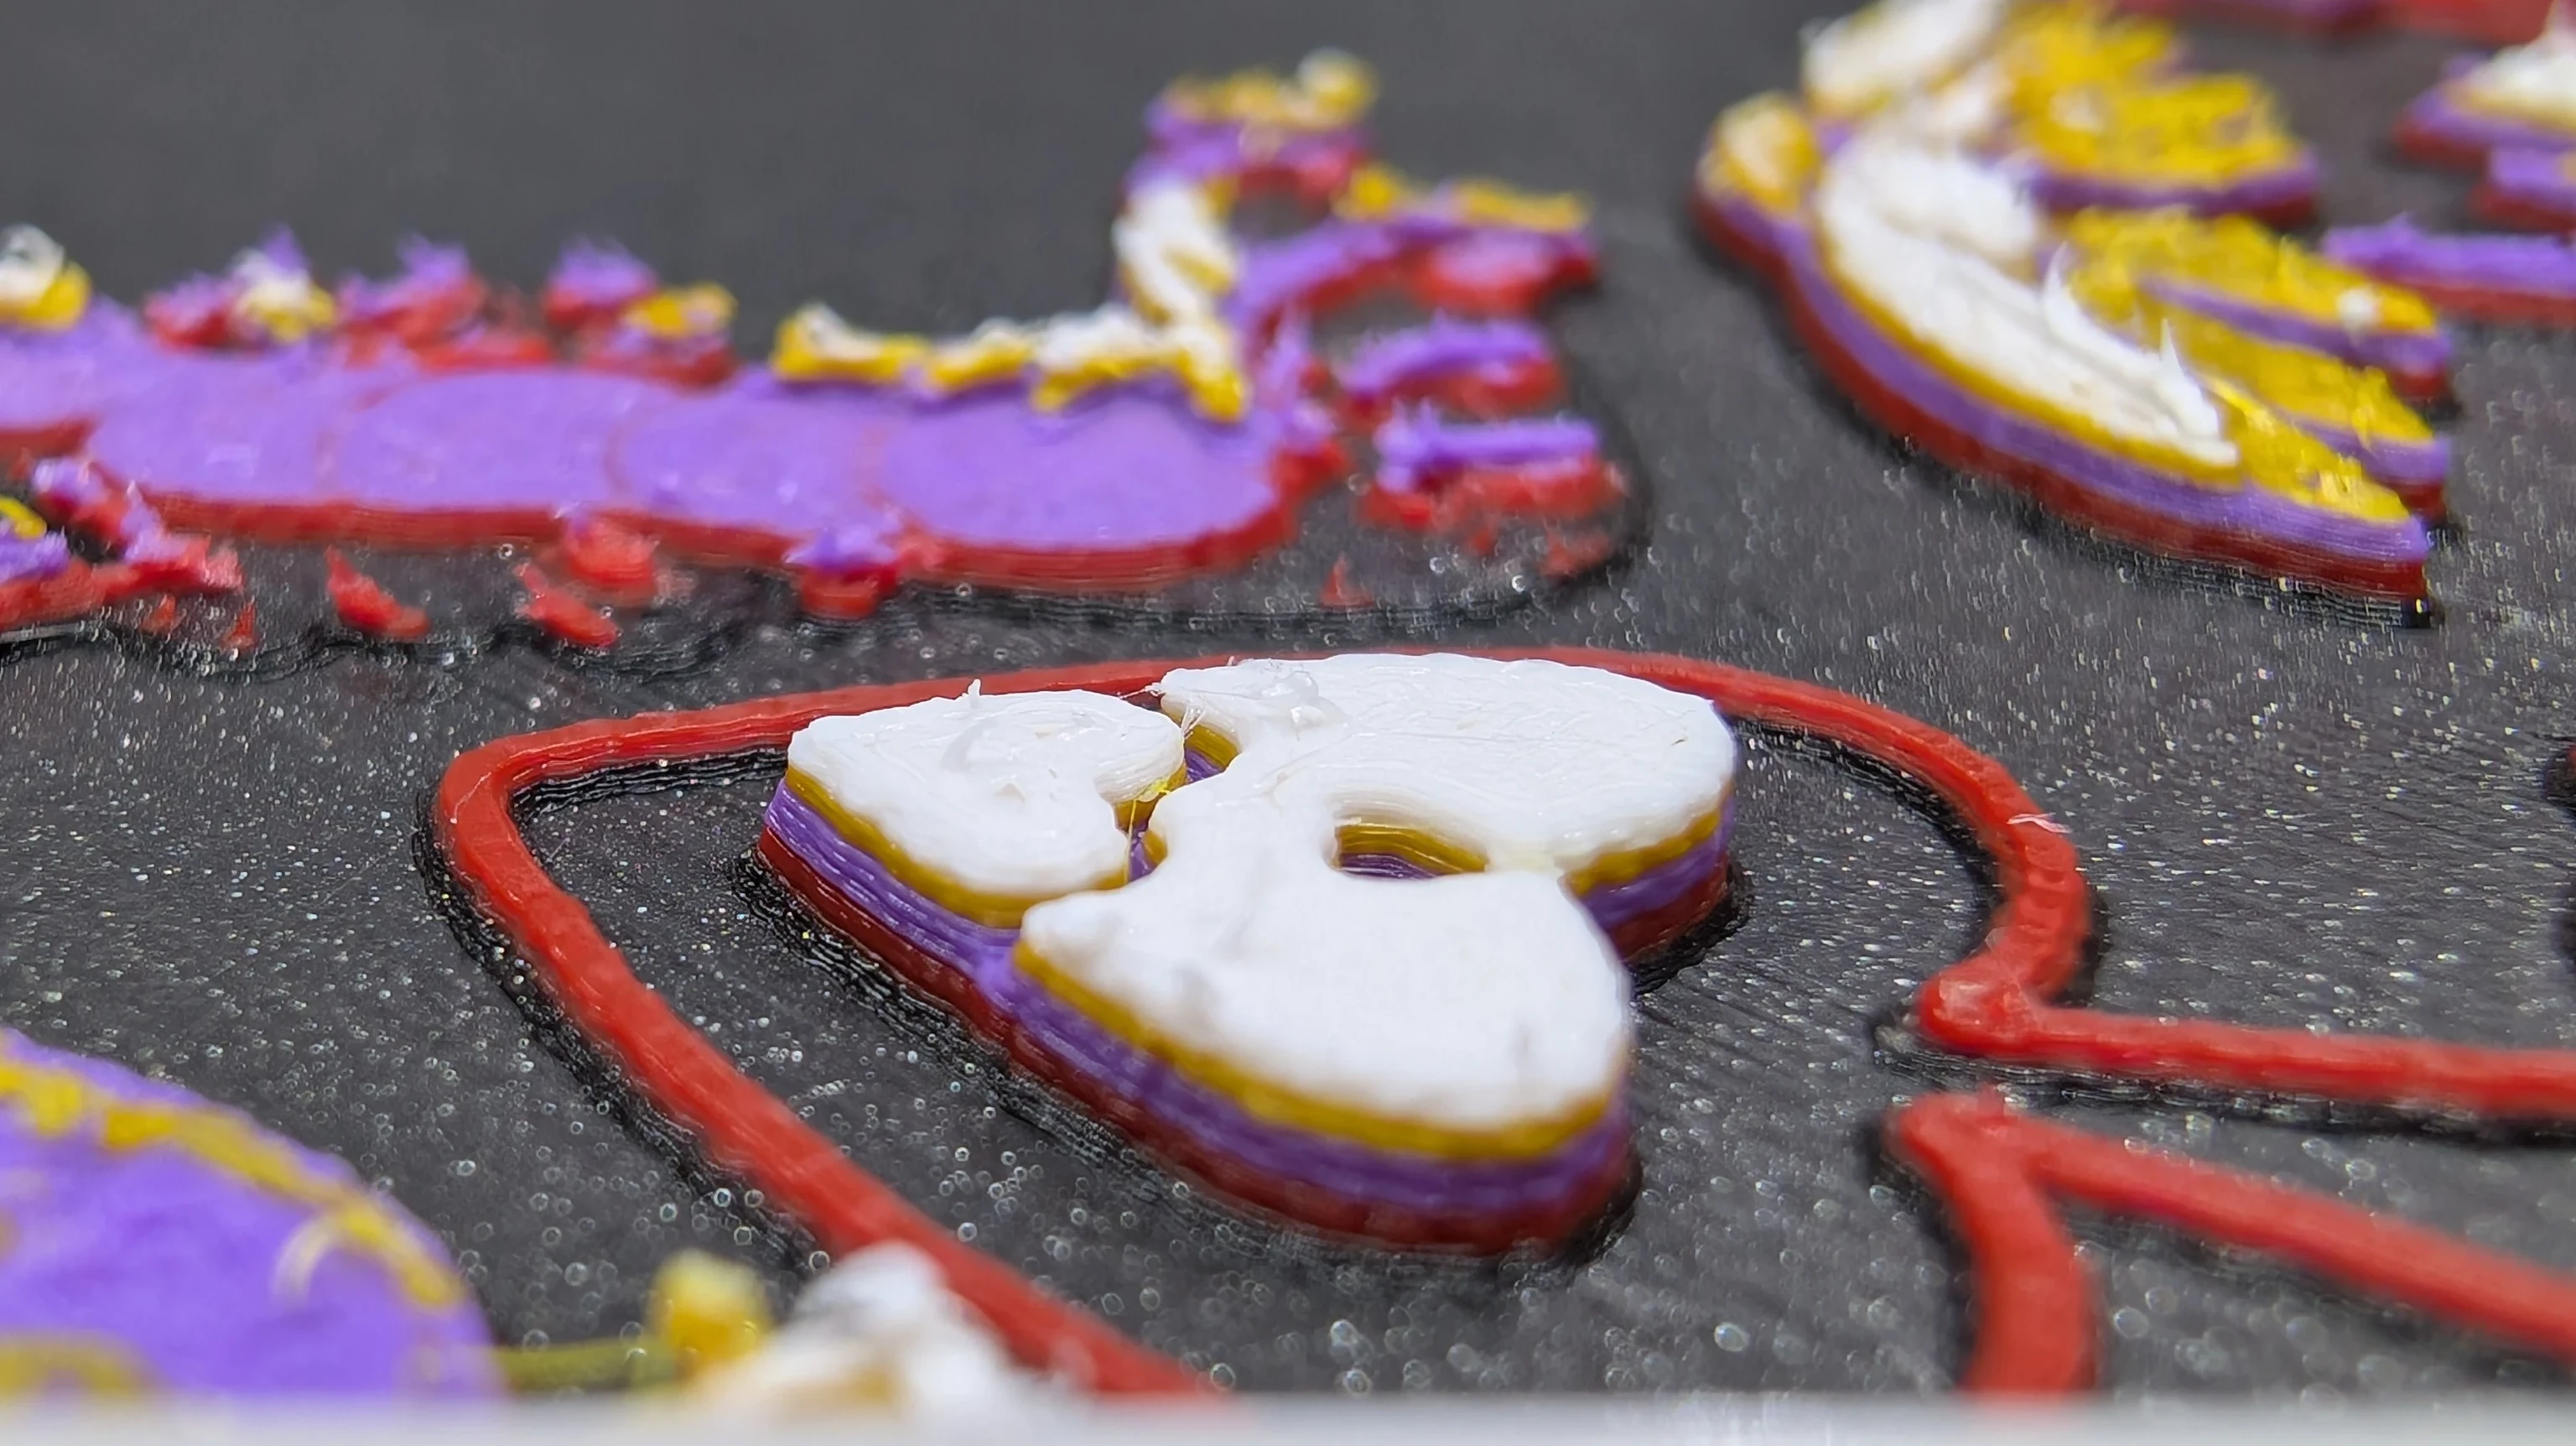
If you are a little unsure about how HueForge works, here’s a closeup. Basically it only prints a single color per layer, changing between them.
My first few attempts failed because I disabled the wipe tower, thinking it wasn’t needed. Boy was I wrong. At least on my Prusa MK3 with MMU2S it really needed it to properly change.
The Foreground
With the background out of the way, it came time to forge a new path. HueForge is fun, but I’m already pretty good at that. Time to try something new. I ran through a lot of ideas, including hand painting Alice (A skill I don’t have), laser etching her outline on the acrylic and flood filling the details, but I finally settled on keeping her 3D printed, but doing a very different (although technically similar) process.
I’ve played around with transparent first layers before, it makes a great technique to create a clean first layer, while having complex detail that might not want to stick to the bed. This seemed like a great way to get what I wanted. Unfortunately, the source image was both highly compressed, and had too many colors, so there was but one option, redraw her in vector.
In comes Inkscape. I imported the jpg of her into inkscape and used it to trace. I couldn’t use the original design 100%, and had to make some choices for the 3D printing medium. Specifically, small details had to be eliminated, lines had to be significantly thickened, and colors had to be simplified. Once the design and art work was done, I duplicated my layer in Inkscape, then used it to merge all the various elements together, then split everything back out by color. I exported only the “Selected” elements so that all my work layers weren’t included. I repeated the process for a fully black silhouette version. With 2 SVGs in hand, I went into PrusaSlice and imported both as parts. I set my layer height to 0.2mm, and so the SVGs I imported I, likewise, set to 0.2mm on import.
This may sound like we are almost there, but no, I had more work to do still. I took the color segmented SVG and exported it to STL. I then opened that STL in Blender to do a little post processing work, cleaning up some conversion issues. Then back to STL and imported it back into PrusaSlicer. This took a ton of time to refine, but eventually I got what I wanted.
Finally, now that everything was in the slicer I built the print part by part. Layer 1 was the silhouette, printed in transparent. If you have a keen eye, you might have noticed that the final version of Alice had 5 primary colors, and the Prusa MK3 MMU2 only supports 5 colors, so how did I get transparent worked in? Just a simple manual color swap on the spool while other colors were being used.
Continuing the layering process, layers 2 and 3 were color layers, but I alternated the colors in a few areas like the skirt and the skin to give different tones. The skirt is layer 2 white, layer 3 blue. And the skin is layer 2 gold, layer 3 red. It just gives me a little more dynamic range with my limited palette.
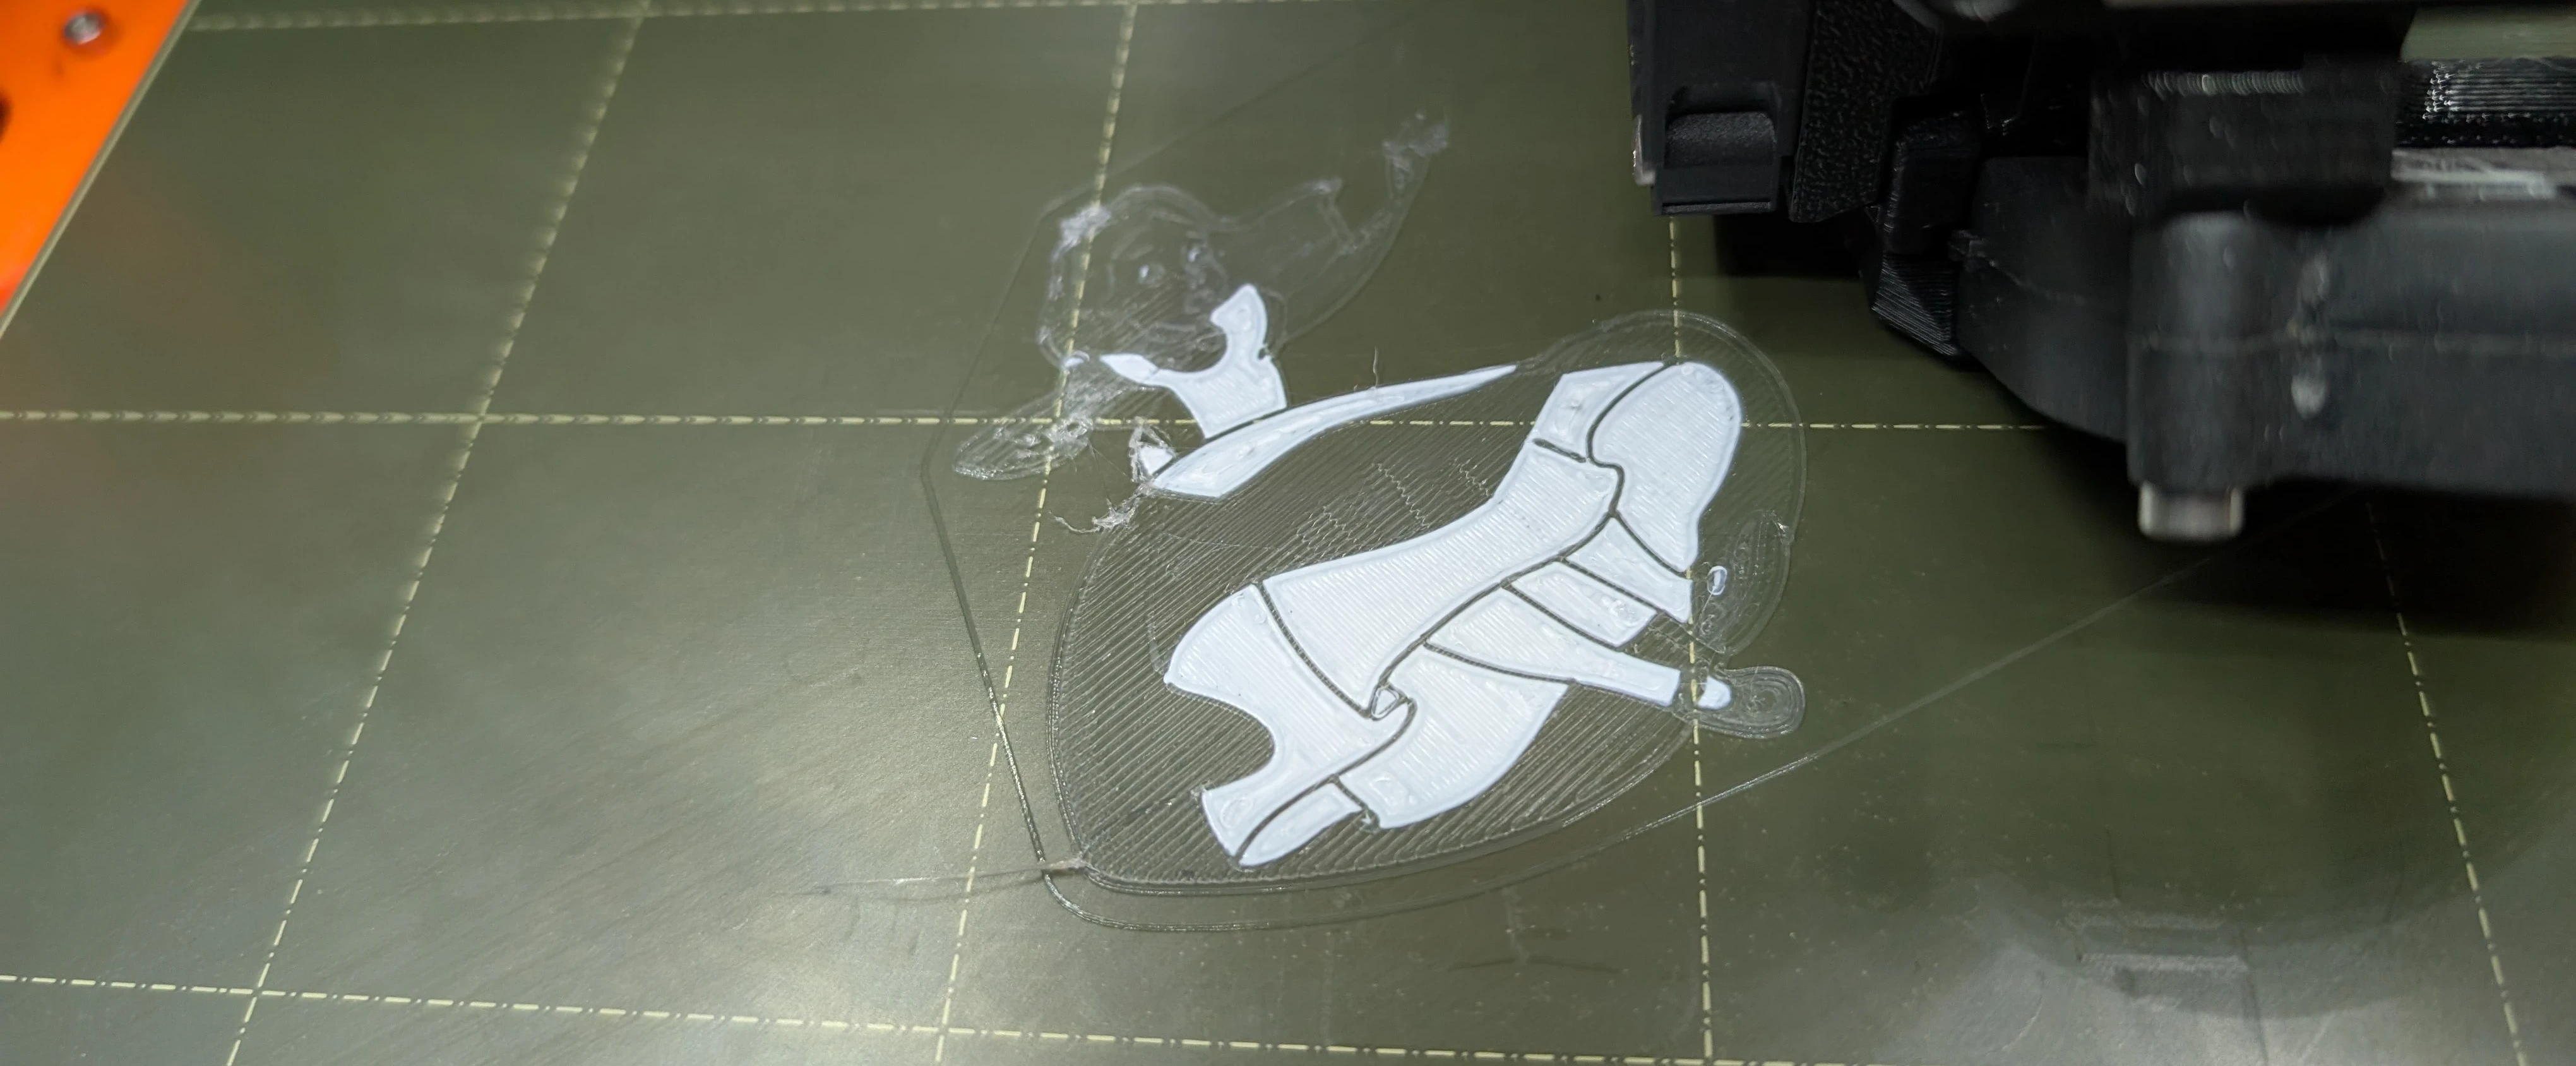
Hopefully this photo helps to highlight the process. You can see the first layer is transparent, that’s our front most layer and it provides a solid bed for the more detailed layers that come next.
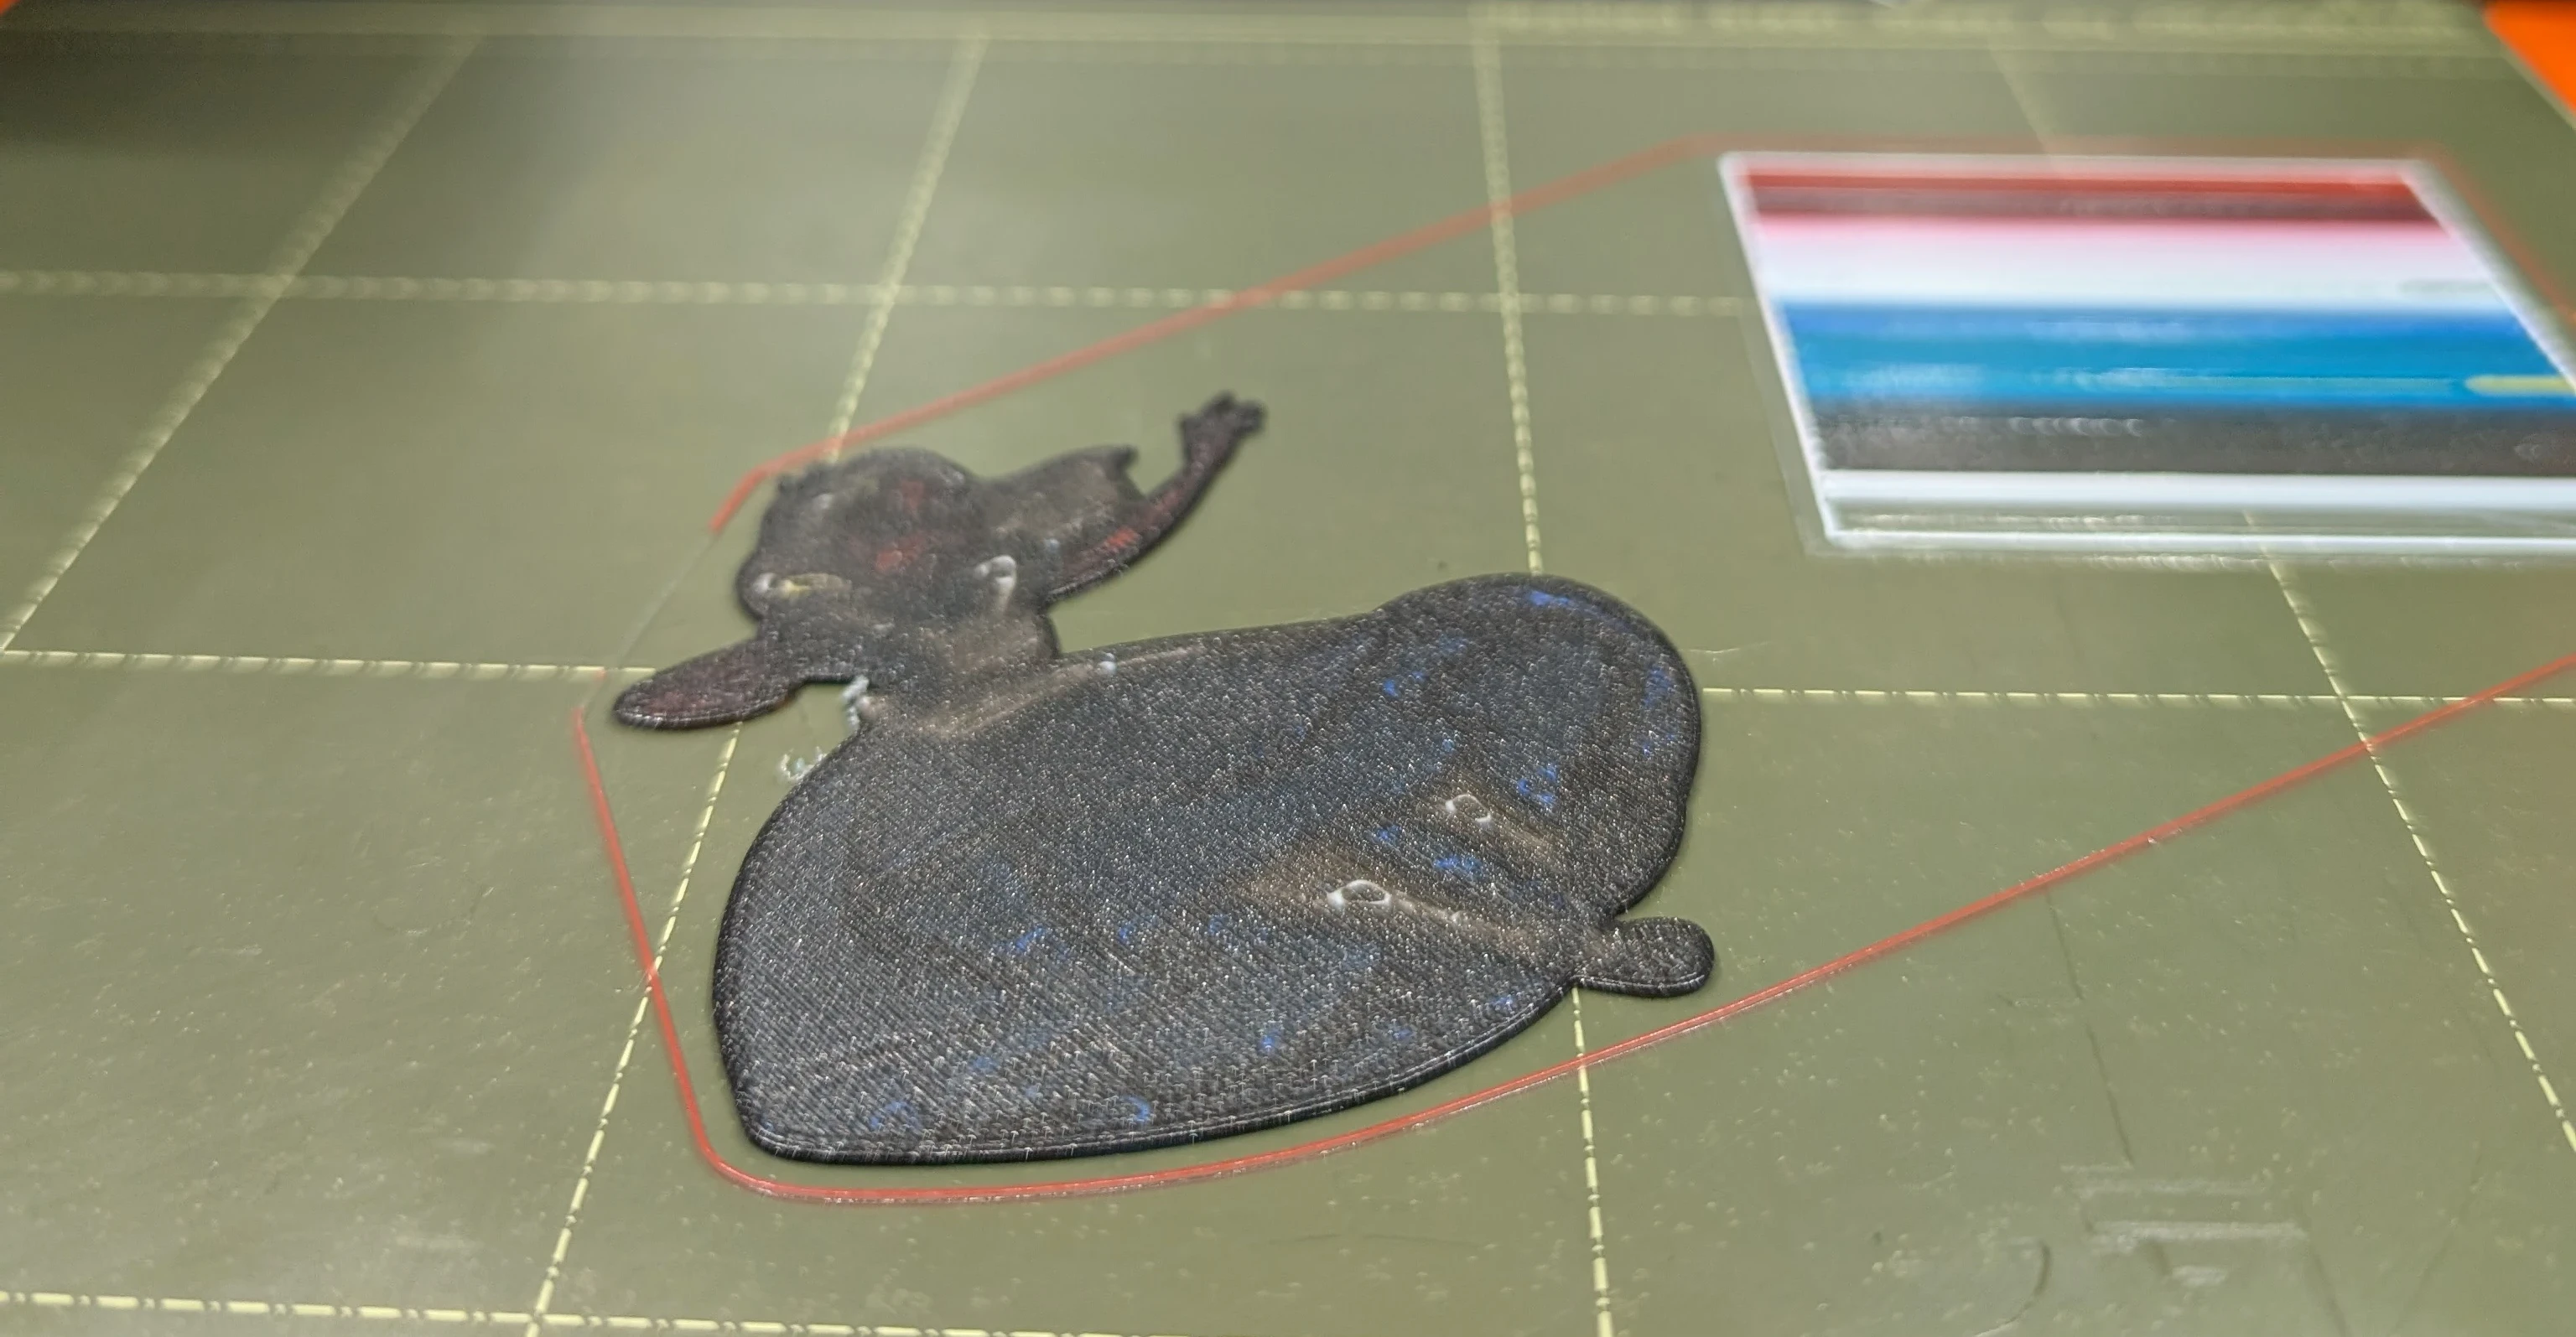
Oh, that’s not very impressive at all. Wait, perhaps if we remove it from the bed…
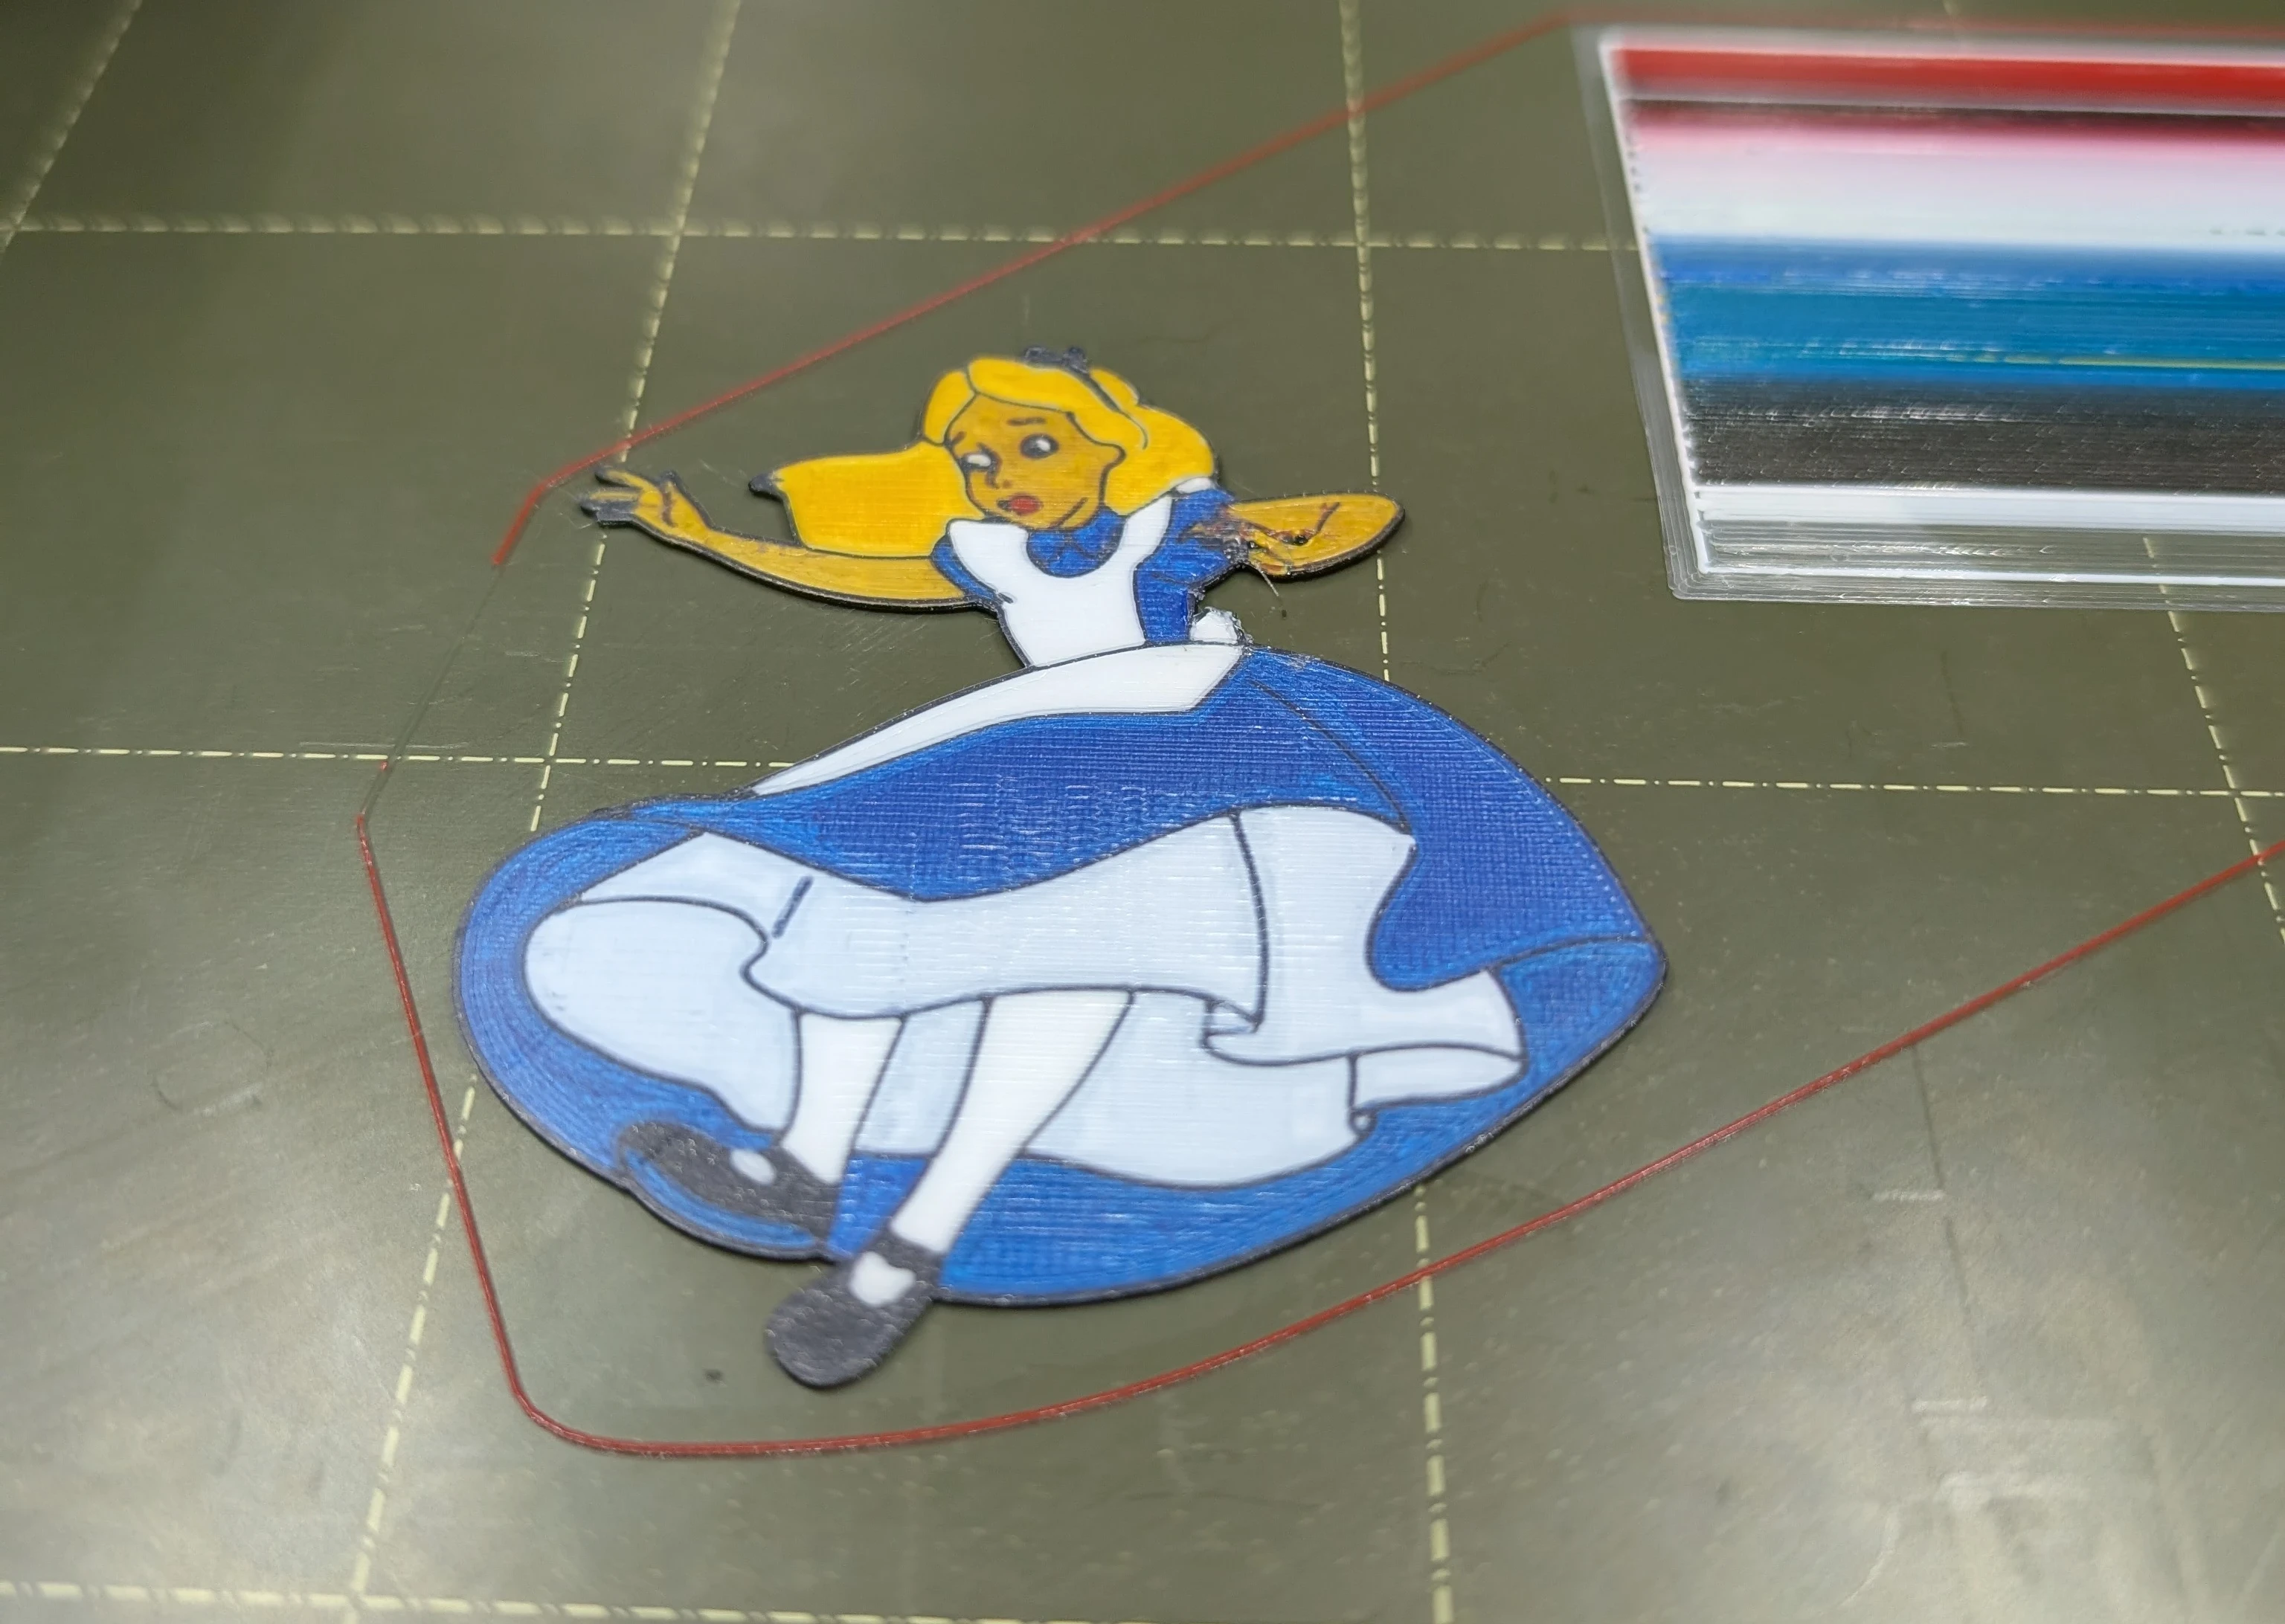
That’s much better. She wasn’t perfect, but pretty sharp none the less. My biggest mistake was going with 0.2mm layer heights. HueForge likes 0.08mm, which really lets the colors mix much better. But at this point I was seeing the finish line and wasn’t willing to do the work that was needed to lower that down.
Frame and Acrylic
The frame was simply generated using my Frame/Shadowbox generator you can find on Printables. This was made for some previous projects, but I’ve found it quite useful time and time again. It was designed in FreeCAD and has a nice spreadsheet embedded in it so you can easily generate frames of any size.
The acrylic cover was simply cut on my laser cutter, nothing particularly special about it, just a nice rectangular piece that could easily be mistaken for glass.
Final Assembly & Conclusion
All that was left was to put it together. I printed a small spacer to hold Alice well above the background, then glued her and the spacer to the background. In hindsight I could have probably printed the space on Alice, and possibly put some holes to screw from behind the background, but glue worked just fine. Then everything slotted into the frame. I also printed a space to give Alice room between the background the the Acrylic. The frame has a nice snap fit, and has a built in comb/rake for hanging on a nail.
The gift went over well. I didn’t keep track of time on this project, but I’d say in excess of 20 solid hours of work went into it. It was worth it, but boy was I ready to be done by the end of it, it was probably 3 weekends spent on it.
Comments or Questions?
I have no idea how to do this right, but I’ve posted this at Lemmy.World’s 3D Printing Community. A great place to leave a comment or question.